In the pursuit of attaining my desired water feature I was physically jarred, nearly blinded by a rock shard, humiliated, confused by profuse leaking, and even more confused as to just why water insists on going exactly where you don’t want it to – despite how much sealant has been slap-happily applied. Oh and do not talk to me about re-directing the flow of water with a strategically placed zen stone! aaarrggghh!
Between evaporation, leaking and the initial postage-stamp sized nature of my pond (it was emptying in a few hours) – it was not the environmentally friendly domain for my future fish inhabitants I had in mind.
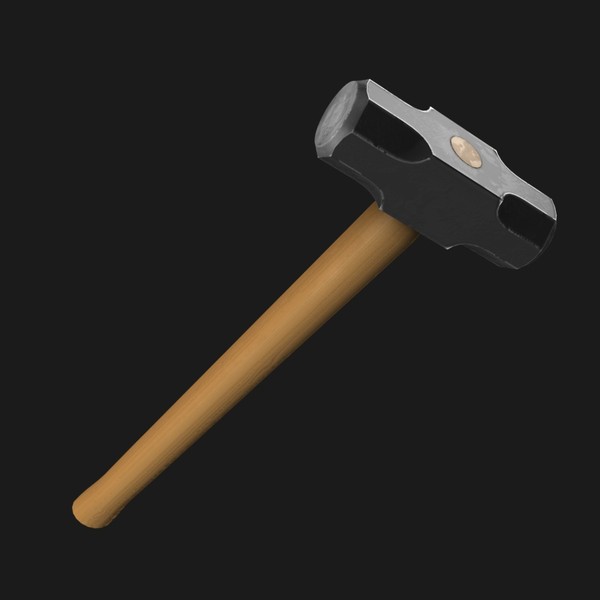
My water feature hated me! My water feature had developed a stubborn persona! My water feature was about to be hit very hard across its smiling rocky escarpment with a rather large blunt instrument.
Let me step back a little – I remember it starting with a sketch, a lot of enthusiasm and blind excitement – “I will have a water feature, I will have it now – and it will be great” I whispered under my breath in an ancient Roman accent? My garden plan sketches revolved around this water feature after all – I pulled up my sleeves, made the obligatory, naive purchase of a tiny Home Depot pond (hey it was an organic shape), and started to dig a hole in rather stubborn (now lantana free) soil. As a side note it seems like the laws of physics are bent in Home Depot when evaluating the size of a pond – they look enormous in the store, all empty and stacked – get one home, situate it and I guarantee it will have shrunk 75%!
My first incarnation water-feature fate at this point was sealed: too small a pond….an elaborate plan….evaporation…. leaking issues….overhead shedding Post Oak, you get the general picture.


My plan was to have a pond at ground level and to pump the water up to an overturned urn on the top of the hill (I built this hill with the dirt dug out for the pond) – and let it bubble down in a somewhat “naturalistic manner”. I have no access into my backyard so all the stone and gravel had to be wheelbarrowed in – a futile endeavor as in 3 years you cannot tell there is any gravel or paving there! – more on that futility later! The pic above right shows the yard in its primitive, stark Bermuda-grass glory and highlights my “irritating water feature” as a design “oasis” starting point.
Look at the size of that pond! It was about to fill up with leaves in a week under the post oak – good job I had no fish at this point- the tannic acid alone would have turned them rusty, and the oxygen deprivation? – It would have been like breeding fish on Mars!
The small pond I realized simply had to go – and this is when it decided to attack me!
I proceeded to dig out the old Home Depot pond (which later became an in-ground containerized bog area) into a wider area for my new, 900 gallon, above ground pond I had purchased and had delivered from a local hardware store. . . . but I had a problem. The “naturalistic” waterfall still flowed down to ground level – not up to the lip of the raised pond. . . hmmm . . .what to do now? I glanced at my sledge hammer.
My wife said she could see sparks flying up from inside the house – and I remember strangely smelling burning just before a hot stone shard hit me below my eye – (it was too hot to wear safety glasses), I did try, they just kept steaming up, filling with sweat (better than my first pond attempt, I noted). I lost my balance numerous times on the rocky, uneven hillside, falling onto the Lava rocks a work colleague kindly had donated to me.
I looked deranged.
I finally built up the rocks to the new height, sealed them and tried again, it still leaked – it became a dry creek bed! Enough said.

I decided to go with a galvanized steel feeder tank with a Cyprio pump and UV filter system, I liked the sleek metallic aesthetic.

Sketches to determine features, location and utilities for the new pond. I decided a smaller feeder pool would be a good addition to the plan for our high evaporation months.
Here is trench I dug for the electrics, rather wide for a couple of pipes you say? I had another idea for this area…more about this later. You can see I had started on my Bermuda grass eradication quest, as well as putting a few plants in the ground.
Here it is in year two, still patchy grass on the ground and yes my first three goldfish.
4th year and an established eco-system.
Feeding time!
One thing I took away from all of this – is not to be afraid of continual change, if it doesn’t work for whatever reason, hit it with a sledge hammer, dig it up and start again.
This principal has carried over into how I approach everything in my garden, from hardscaping to planting – just because it exists doesn’t make it right. This requires looking at things you may have looked at a thousand times with fresh eyes – I am just glad I still have two!
Stay Tuned for:
“My Shed Moved!”
All material © 2008 for eastsidepatch. Unauthorized
intergalactic reproduction strictly prohibited, and
punishable by late (and extremely unpleasant)
14th century planet Earth techniques.























Comments on this entry are closed.
Pam/Digging (http://www.penick.net/digging) says:
And then what happened, Philip? I’m eager for the details of the crazed water feature.